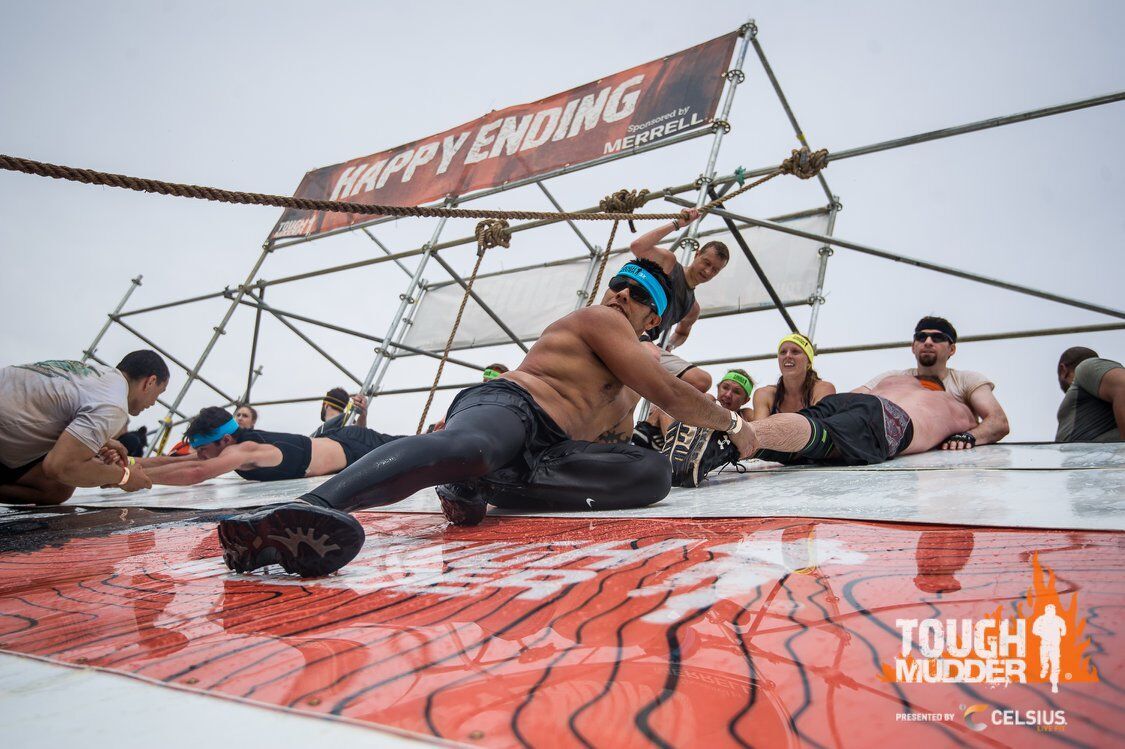
Happy Ending, is the largest and most unique obstacle to come from TMHQ’s Product Team. In 2018 it’s all about being #TougherTogether, and this behemoth obstacle is the physical embodiment of that idea. Happy Ending is a shared-finish experience for every Mudder—Full and Half finishers—to live and breathe the camaraderie and teamwork that makes this Tribe the best in the world.
So no matter which Tough Mudder event you’re conquering, you’ll need the tools to tackle this obstacle. For starters, you’ll need the help of your fellow Mudders—in the form of a human pyramid—to scale the slippery, 40-degree-angled wall. Once at the top, you’ll need to lend a hand to the struggling Mudders below before you channel your inner child and whoosh down the 30-foot slide into a pit of water. Before gathering your group of helping hands, follow these four training tips to build the adequate functional fitness for nailing this obstacle and earning your headband—which, come to think of it, might be the happiest ending of all.
1. GET MORE FLEXIBLE—EVERYWHERE
Being the “anchor” on a Happy Ending human pyramid typically requires you to squat down and have someone step on your shoulders to be the “second link” to the top. Getting into this squat requires immense hip, knee, and leg flexibility. Climbing up the “links” in the chain requires flexibility in the shoulders and hips since you’re taking giant steps up and over other Mudders’ limbs.
To get more flexible in the hips, try a butterfly stretch. Sit on the ground with your heels together and your hips open. Place your hands on your ankles as you draw your feet in while leaning forward slightly. (Keep a straight back!) For added stretch, try to move your knees towards the ground. You should feel your hips opening.
2. BUILD BALANCE AND STABILITY
Reaching the top is great—but if you can’t help others up the wall because you keep falling down, then you’ve missed the real point of Happy Ending (in other words: it’s about more than just you!). Perhaps the most important joint in conquering this obstacle is the ankle. Your ankles must be able to support one, two, three, or more people while your back slips against a greasy wall.
Work on ankle stability by trying to balance on a square foam pad or Bosu Ball on one leg for as long as possible. Then, switch legs. Do this for 3-4 sets, aiming to reach 30-60 seconds each leg. Remember to incorporate plenty of single-leg exercises into your Tough Mudder workouts, such as single-leg kettlebell deadlifts and single leg forward hops.
3. INCREASE UPPER BODY ENDURANCE
One struggle point during Happy Ending might be when you’ve grabbed someone’s hand/wrist/arm and you’re trying to either help another Mudder up…or you’re that struggling Mudder trying to get up. Eventually, the climbing Mudder might drop, unable to advance up the wall, due to a lack of back, arm, and chest muscle endurance. If you’re hanging there holding someone’s hand for a while, you should be able to use that anchor point to lift your own body weight up and over the top.
To help to build upper body endurance, do four rounds of this 4-move workout:
-5 Inverted Rows (or pull-ups for more advanced Mudders)
-10 Push ups (beginner Mudders can be on their knees)
-15 Biceps Curls (use a resistance band or dumbbells)
-15 Triceps Dips (this can be done off the floor, a box, or a bench)
4. GET A BETTER GRIP
At one point or another, grip strength become an essential part of getting over Happy Ending. This is especially true if you’re one of the Mudders who tries to really stretch it by using minimal Mudders below and grabbing a long-limbed Mudder above to pull yourself up without much stacking underneath you. During this obstacle, you’ll grab shirts, shoes, hands, essentially anything that’ll safely get you one inch closer to your headband.
Build grip strength by doing farmer’s carries, dumbbell shrugs, and dead hangs from a pullup bar. To perform farmer’s carries, stand holding a dumbbell in each hand at your sides using a neutral (palms facing each other) grip. With chest and shoulders back, walk forward for 10-50 yards, then turn around and walk back. For more grip-building tips, check out 5 Ways to Build an Iron Grip.


